
Build a practical camp around the fire, keep exits clear, place traps carefully and divide jobs with your team.
Build around the existing campfire and protect your fuel supply before spending heavily on walls. Keep the crafting area and healing supplies reachable, leave a clear exit and agree on a safe team route. The forest layout changes between runs; there is no single fixed coordinate in these sources that guarantees the best base.
Use this layout as a starting point and change it as raids expose weak spots. Enemy pathing, placement limits, recipes, class perks and event content may change. A wall, planted tree or lit fire is not a guarantee of safety: Cultists can attack the camp, and traps can hurt players. Check the current game and adapt after observing an actual raid.
Layout: keep a safe route through the camp
                  OUTSIDE / explore
                         ↑
            wall / trees   clear exit
         ┌─────────────────  ───────┐
         │  food / storage   [T]    │
         │                          │
         │    FIRE     BENCH        │
         │ fuel + healing           │
         └──────────────────────────┘
              wall / flexible gap

[T] = optional trap, off the team's route; not to scale.
This is a conceptual diagram, not a proven pathing exploit or exact build grid. Locate the exit and traps where your group can see them; do not enclose players without a route back to fuel and healing. If traps damage teammates or interrupt movement, move them away from the shared path. Terrain and spawning differ, so observe where enemies actually enter and adjust rather than assuming a single funnel always works.
| Area | Put here | Check before committing |
|---|---|---|
| Fire and fuel | Fuel reserve, healing and a path to the bench | Can one player refuel and another reach the supplies? |
| Production | Food and useful processing close enough to service | Can you access devices while under pressure? |
| Outer edge | Optional wall segments, trees or defenses | Do not spend the fuel reserve or block sight and escape. |
| Exit and trap zone | A visible gate or gap and carefully placed traps | Do teammates know the route? Can traps hurt them? |
Build in stages
- First secure survival. Gather fuel, mark a return route and make a Map if its displayed cost is affordable. The campfire and enough healing matter more than a finished perimeter.
- Choose a service area. Keep your bench, food and reserve supplies reachable from the fire. Leave open ground for fighting and do not assume the fire stops every enemy.
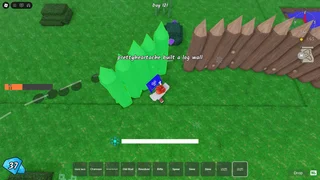
- Add a small barrier and one visible exit. Extend walls only after checking fuel. Sources report trees and walls as useful obstacles, but pathing may change; watch the raid instead of promising a sealed base.
- Add traps only when you can maintain them. Bear Trap costs and placement can change, and traps may hurt players. Tell your team where each one sits and follow current in-game prompts for reset or recovery.
- Improve after the raid. Refill fire, heal, clear surviving enemies when safe, then change the weakest approach. Add production or further defenses only if the team can still service and exit the camp.
Divide jobs without locking players into roles
| Team | Useful division | Communication |
|---|---|---|
| Solo | Alternate fuel collection, food and short exploration; return on the raid warning. | Leave yourself a safe route and reserve. |
| Two players | One focuses on fuel and camp, the other gathers or explores; switch as needed. | Call out fire level, return time and threats. |
| Three or more | Assign temporary fuel, food/medic and scout duties; everyone helps defend. | Agree on the exit, trap positions and who carries revival supplies. |
Before night, bring distant teammates back, identify the ranged attackers and avoid crowding the same narrow passage. After a teammate falls, assess enemies and safe access before attempting a revive. A plan should adapt to current equipment, not require a specific paid class.
Common mistakes
- Using every log for walls: keep fuel for the fire and emergency rebuilding.
- Treating the campfire as protection from all threats: Cultist raids still require active defense.
- Placing traps on the only team route: friendly players may be harmed; mark the location and leave a clear way out.
- Depending on a perfect tree ring or enemy glitch: growth, collision and enemy behavior can change. Watch what happens in your current run.
- Building a huge camp too early: first solve fuel, food, healing and return routes; add complexity only when it helps your team.
Sources
Revision history
— Recently updated