Find the key behind the photo, the cutters in the rec room and the emergency exit after the lobby encounter.
The hotel route hinges on three easy-to-miss interactions: turn over the bar photo for the old key, collect the wire cutters from the rec-room pool table, and return to the lobby painting after Room 204. The last part leads to the emergency-exit key and the way out.
This walkthrough covers Grace's opening Wrenwood Hotel investigation on PC and PS5. It reveals the steps and a brief encounter, but avoids later-story details. Screenshots show the English interface; their reuse rights have not been established.
Enter the hotel · Old key and reception · Room 204 · Painting and escape
Enter the hotel
Walk down the street toward the investigation. By the barber shop, an information board on the right holds the optional Wrenwood City Guide file; collect it before continuing. After the officer lets Grace through the police tape, follow the alley, bend right and crouch under the collapsed scaffolding. Continue past the sealed front entrance to the side employee entrance.
Turn on the flashlight using your displayed control, cross the dark rooms and kitchen, then go through the far red door into the lounge and bar. Open the inventory and examine the Investigation Report if prompted; rotate and open the report to read it.
Old key and reception
Follow the evidence markers toward the bathroom at the back of the lounge. After inspecting the scene, return to the bar and examine the photo attached to a small column. Rotate the photo to its back and take the old key; the writing points to Room 204.
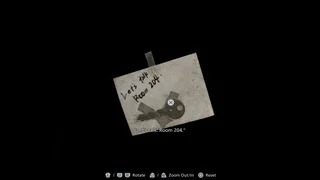
The key is on the back, so rotate the photo rather than only looking at its front. Source: IGN.
Use the old key on the south door of the bar/lounge and follow the hallway to reception. For optional files, look for the hotel brochure on the lobby floor, then go behind the reception desk to the office. A drawer contains a closure notice and the hotel floor plan is on the wall beside the desk. Return to the lobby stairs and go upstairs to the rec room.
Room 204
In the rec room, note the locked emergency exit on the right; you'll return to it later. The door toward Room 204 is tied shut. Turn back to the pool table and take the wire cutters from the toolbox among the overturned stools. Use them on the tied door, follow the hall and enter Room 204.
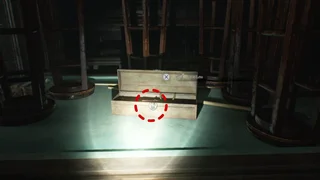
The toolbox is on the pool table, not at the tied door. Source: IGN.
Inspect the photos on the bed to advance. During the following flashback, follow Alyssa and the on-screen directions until control returns to the present.
Painting and escape
Go back through the rec room and down to the lobby. Move the luggage cart in front of the painting, then inspect the painting to find a satchel. Rotate it to open its clasp; inspect the notebook inside, turn it and open it to read Alyssa's Journal. Inspect the satchel again to find the disk and continue the scene.
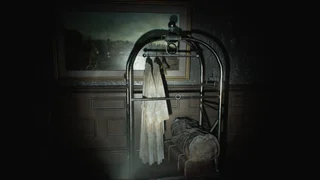
Move the cart first; the painting is behind it. Source: IGN.
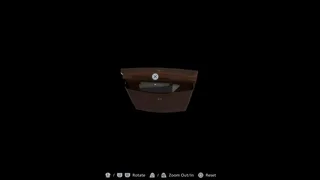
Rotate the satchel to its clasp, then look inside. Source: IGN.
When Grace becomes trapped during the encounter, follow the displayed hold-to-free prompt while moving away from the shotgun's aim; listen for the weapon's firing cue. After she gets free and the scene supplies the emergency-exit key, follow the prompts. When you can move freely, run upstairs into the rec room and use the key on the emergency exit to the right. The following sequence completes this hotel segment.
Stuck? Check the back of the photo for the old key, the pool-table toolbox for cutters, or the satchel's clasp and contents for the notebook and disk. At the final exit, make sure you have progressed through the lobby encounter before returning upstairs.
Sources
Sources
- IGN: Grace - Wrenwood Hotel Walkthrough — Route, key locations, investigation and escape; screenshot source
- Vandal: Hotel Wrenwood — Hotel route, document locations and progression
Revision history
— Recently updated