Use area saves and a short Wrenwood and Care Center checklist before progressing.
Before advancing out of an area, check its rooms, files and available routes, and keep a separate manual save when you can. PowerPyx's guide reports no chapter select and treats collectibles as potentially missable when an area closes; a previous area save is therefore useful, but only if you actually made it. This is a partial first-run checklist, not a verified complete collectibles route.
Before leaving each area
- Check the map for accessible rooms and note locked doors you cannot yet open. Do not assume every locked door can be solved during the current visit.
- Open the Files menu next to the inventory and compare names you have found with your notes. PowerPyx says some challenge trackers become visible only after one completion; an absent tracker alone does not tell you what was collected.
- When you reach a save point and have the resources required by your difficulty and character, make a separate manual save before a major transition. In Grace's Standard (Classic) and Insanity sections, ink ribbons limit saves; budget them rather than promising unlimited backups.
- If a cutscene or interaction appears likely to move the story forward and you want to explore first, finish accessible checks before triggering it. Whether a particular door or area remains reachable depends on the story state; confirm against a detailed guide rather than assuming free return.
Wrenwood and the early Care Center
The following examples come from a published Casual/Standard route. Item names may differ in your language; keep the English title below as a lookup aid.
| Stage | Check before moving on |
|---|---|
| Wrenwood street | Examine the city map on the right for Wrenwood City Guide. |
| Hotel lobby | After the old key opens the door, inspect the paper on the floor near the stairs for Hotel Pamphlet. |
| Hotel office | Go behind reception into the back room and open the blue drawer for Notice of Closure; the hotel map is on the wall in the same room. |
| Care Center, Grace | When control returns in Room 203, check the small table for Progress Notes. In Room 202, inspect the closet for Note on Cardboard Box. |
| Nurses' Station | The published route places an antique coin above a locker, reached from the cart on the left. Check it before moving that cart to the right. |
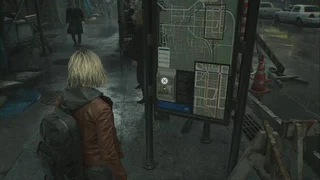
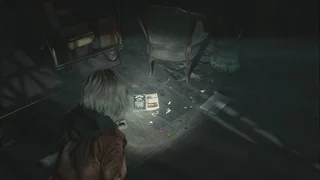
Vandal gameplay screenshots: the street map and the paper on the lobby floor. Reuse permission not verified. Vandal
These are examples, not the complete contents of either area. On Insanity some item positions differ according to the source, so follow the description for your difficulty rather than applying a Casual route blindly.
After the early areas
Use the same routine at each transition: save if possible, inspect reachable rooms and make a note of what remains locked. Some collectibles may be counted across playthroughs according to the cited guide; that does not make every missed object recoverable in your current run. For a specific later collectible or an irreversible story trigger, consult an area-by-area route before progressing. This checklist has not been tested through the whole game and does not establish every return boundary.
Later stages: five more checks
These are additional examples from the same Casual/Standard guide, not an exhaustive list or proof that the route remains open later.
- Care Center, Leon: after cutting a door with the chainsaw, pass the next door and look on the fireplace for Mr. Raccoon.
- Basement, Grace: after regaining control, walk a few steps through the tunnel and look beside the body for Staff Member’s Last Words.
- East Raccoon City, Leon: shortly after arriving, inspect the ground on the right by the trash bags for Raccoon City Incident Newspaper.
- R.P.D. Main Hall: check the box opposite the save point for R.P.D Perimeter Report; in the nearby West Office, check the first desk on the right for Top Secret Operation.
- ARK, Grace: from the typewriter save point, the published route describes an open door on the right to the Sterilization Chamber; a safe sits by the window, with an enemy nearby. Check it when safe and follow the clue for your difficulty.
Before leaving each stage, save when allowed and consult the source for the remaining items and transition details.
Reference: area-by-area collectible locations and difficulty scope
Sources
Revision history
— Recently updated