Learn three practical uses for a Gloo Wall and practice placing it under pressure.
A Gloo Wall gives you temporary cover, not safety from every angle. Use it to block a known line of fire, then decide whether to revive, move or retreat. The wall can be attacked or bypassed, and an opponent may approach from the side. Garena describes it as cover for close fights and movement across open terrain; availability and behavior can vary by mode and update.
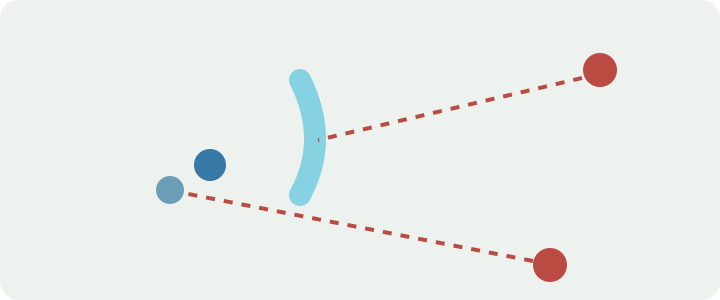
Conceptual diagram: blue players shelter behind the wall from one red enemy; the other red enemy has a possible side angle. The illustration is not gameplay footage.
Place it before you need it
Find the Gloo Wall control in your current HUD and check its placement preview and available stock. In a practice area, aim at clear ground between yourself and the threat, place the wall and step behind it. Repeat while moving. Placement can fail when the position is obstructed or invalid; if the preview is blocked or no wall appears, move to a clear nearby position instead of standing still and repeatedly tapping. Controls and rules vary by device and mode.
Three useful situations
- Rescue: if a teammate is down and the enemy's angle is known, place cover between that angle and the teammate before starting the revive. Check for a second angle and teammates' cover; cancel and reposition if the flank becomes unsafe. A wall does not guarantee a revive.
- Move: use the wall as a brief screen to reach a building, slope or other solid cover. Decide the next destination before stepping out; running into open space from either side exposes you again.
- Retreat: block the current line of fire and leave toward cover, not directly along the wall where the attacker can easily follow. Watch your remaining supply and listen for movement around the ends.
Practice without guessing
In the training area, mark a fixed piece of cover and practice placing one wall, moving behind it, then reaching that cover. Repeat from different angles and on slopes; check whether the wall actually appears where intended. With a consenting teammate in a suitable practice mode, practice shielding a revive and call out an exposed flank. Adjust HUD placement if you miss the control, and note mode/version differences.
Garena's developer explanation supports Gloo Walls as cover; the drills are tactical suggestions, not guarantees. Missing material: original gameplay screenshots and recorded rescue/movement drills have not been created or tested, so terrain and placement edge cases still need live verification.
Sources
Revision history
— Recently updated